
Here’s the problem you may experience when creating your next eLearning project:
You have a pre-determined size that you must adhere to. For this example, you must adhere to a 800 x 600 project. How much recorded screen can you really fit inside an 800 x 600 work area?
Not much.
You can use a program like Camtasia for a video with zoom and pan but then how can you move in and out of custom created slides and interactions with the screen capture?
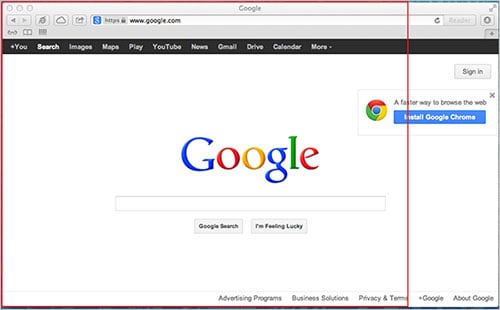
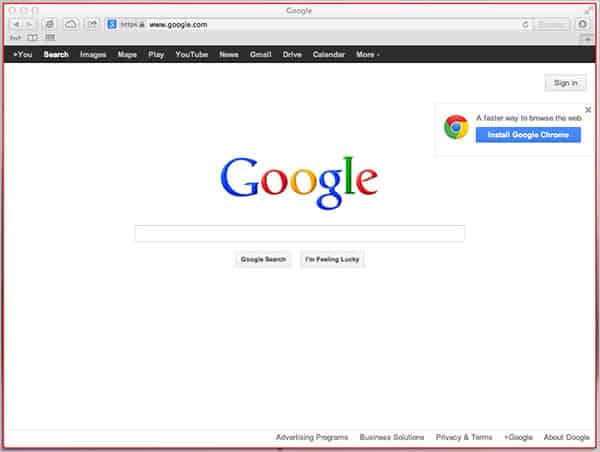
Even the Google home page, which is arguably the most basic web site, takes up more width than 800 pixels. Height is easy to account for because people are accustomed to scrolling up and down anyway. Side to side is not so common and in eLearning, it’s not user-friendly.
There are also solutions to this in Storyline but I will not go into these as I do not own a copy of Storyline (I do dream of owning one someday though). I will mention the solution off the top of my head in Storyline is very nice and effective, you can zoom and pan right in a demonstration or training, aka ‘show me’ or ‘try me’ respectively.
We’re going to look at a solution to this real estate problem in Captivate.
Here’s a solution to that problem other than creating the entire project in a larger size and then squeezing it using web page dimension settings.
- Create your Captivate project in your standard dimension, in this example, use 800 x 600.
- Create a second Captivate project with a larger dimension. For an 800 x 600 project, 1024 x 768 will work perfectly as most content will fit nicely within those dimensions and it’s the same ratio as the original 800 x 600.
- Capture all your demos, assessments, or training screens within the 1024 x 768 project.
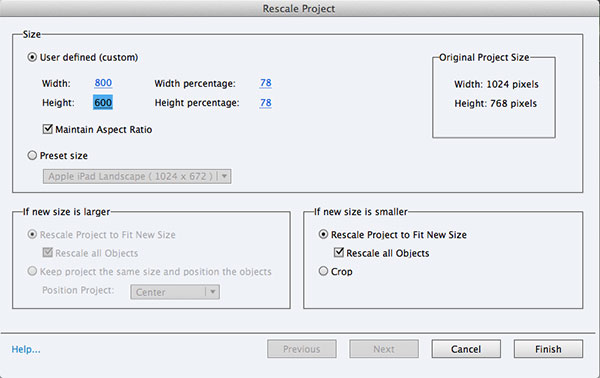
- Resize the slides in your 1024 x 768 project to 800 x 600 by clicking on Modify, Rescale Project… I like to copy the slides to a 3rd, unsaved project as needed, resize them, then copy those slides to my 800 x 600 project.
- Remember to type in 800 in the width, Captivate will automatically adjust the height for the slide so they are the same aspect ratio. Don’t change any other settings or it could disturb the content on each slide. See the below image for the settings you should use (size is the only section that should be personalized but I’d recommend keeping the ‘maintain aspect ratio’ box selected).
- You’re done! You can copy your resized slides to your main project and have the perfect fitting screen capture while maintaining all the interaction for your lesson.
That workflow has made creating interactive eLearning lessons a breeze, which can then be transferred to any size as long as you stick with the aspect ratio.
If you need help with figuring out an aspect ratio, check out this website that I use regularly when developing all sorts of projects: Aspect Ratio Calculator
Just type in your preferred final aspect ratio and put in whatever the minimum width is for your content to fit properly within the recording window. You should stay within the smallest aspect ratio you possibly can, the larger the size difference between your two projects (resized and final), the worse the quality will get.
Be careful with rescaling, because even while downscaling you always have quality loss. If you want the reverse: add a logo and other objects to a captured slide, have a look at my article about creating a Knockout master slide. It was written for versions 5/5.5 but works also perfectly in version 6.
Thanks Lieve for the comment and clarification, it’s definitely a good idea to always pay attention to quality loss even when scaling down. The smaller the image gets, the less detail will be legible.